The replication process
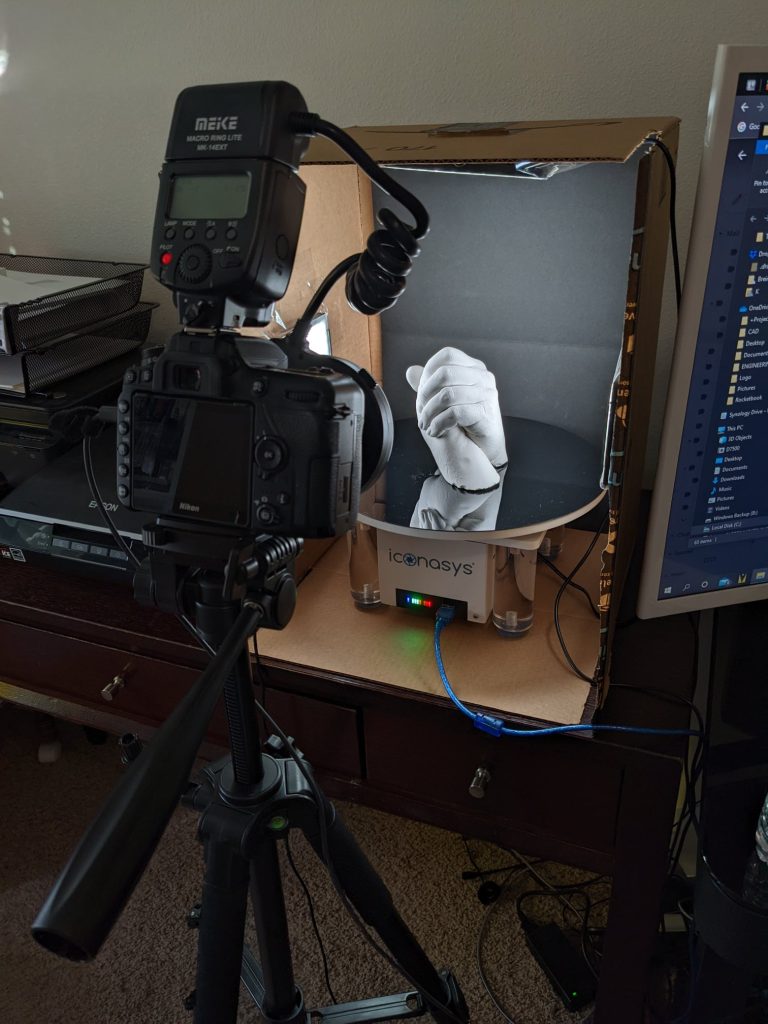
Step 1: Photograph Molds
Photograph Molds (Data Set): Photographing Molds (Data Set): The equipment includes camera gear (Nikon D7500 camera body, TOKINA ATi 100mm macro lens, 74″ tripod, studio lights, intervalometer shutter release, macro ring flash), Iconasys Turntable 11″, Iconasys software, and 3DF Zephyr photogrammetry software. Photogrammetry is defined as “the science and technology of obtaining reliable information about physical objects and the environment through the process of recording, measuring, and interpreting photographic images and patterns of electromagnetic radiant imagery and other phenomena” (Wikipedia). In short, I begin by capturing photos of the angel molds, which I will subsequently import into photogrammetry software to reconstruct a 3D model.
Step 2 Photogrammetry
Photogrammetry Reconstruction:
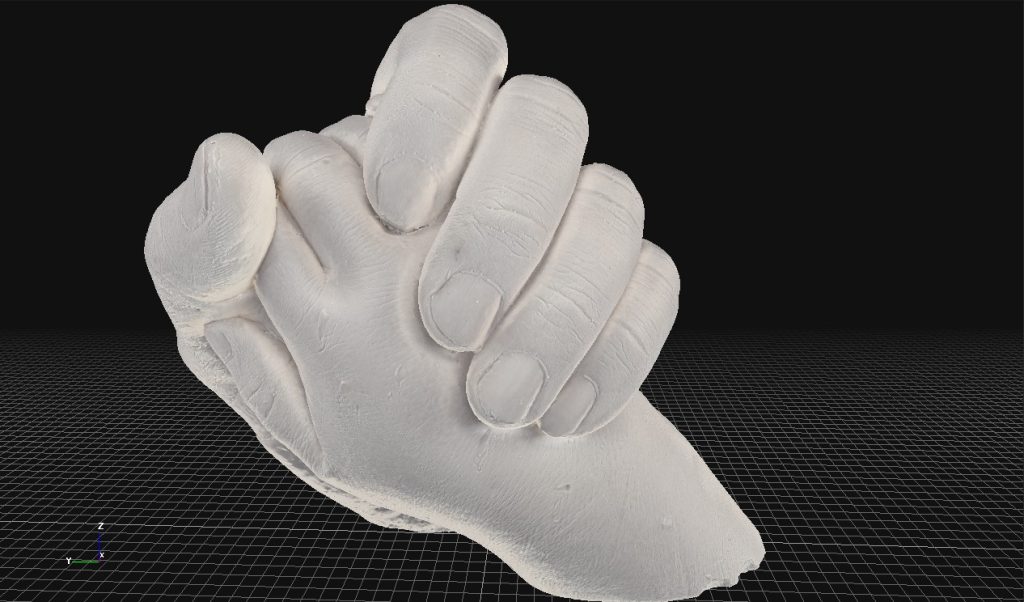
I import the photographs into photogrammetry software to serve as my dataset for the reconstruction process. Utilizing a turntable, it becomes crucial for me to employ the software to mask out the background from the images. Once the dataset and masks are prepared, the software aligns the images by identifying common key points across all the photos. Subsequently, it triangulates and positions the camera based on these points in relation to the mold featured in the photograph. After aligning all camera positions, the software utilizes the common points to generate point clouds, visually representing all surface points on the plaster mold.
The software then connects these points, creating a 3D mesh that accurately reflects the surface of the plaster mold. The final step involves generating a textured mesh, applying textures to the model to achieve a realistic reconstruction of the plaster molds, as illustrated here.
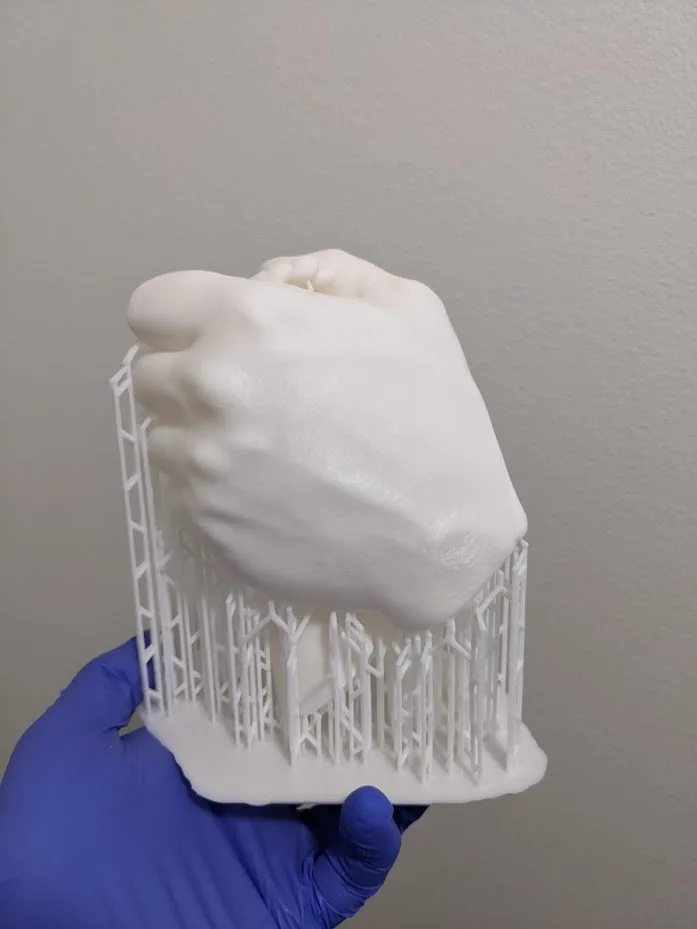
Step 3 Create Printing Files
3D Printing Files:
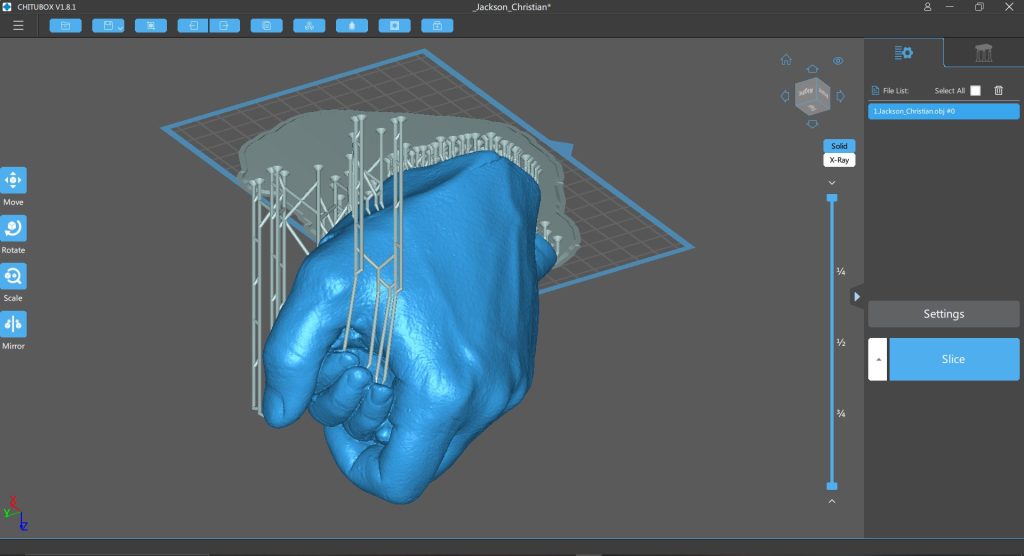
The third phase of my process involves preparing the 3D model of angel molds for printing on my MSLA (Masked Stereolithography Apparatus) printer. Careful planning is crucial to determine the model’s placement on the print bed and the required supports between the bed and the mold. After printing, supports are removed and the print is cleaned using 99% isopropyl alcohol. I utilize free slicing software from www.chitubox.com to arrange the print, manage supports, and segment the print into layers. The software generates a slicing file (CTB) for programming the MSLA printer with correct layer thickness and curing times. It provides valuable information, including estimated print time, material cost, and details about the mold’s physical volume and weight. The UV-cured printing method on the resin printer is efficient, taking only 2.5-5 seconds to cure each layer. The MSLA printer uses an LCD screen to control UV exposure, projecting a specific image for each layer and ensuring high-accuracy prints. Multiple molds can be printed in one session, optimizing printing time and cost efficiency
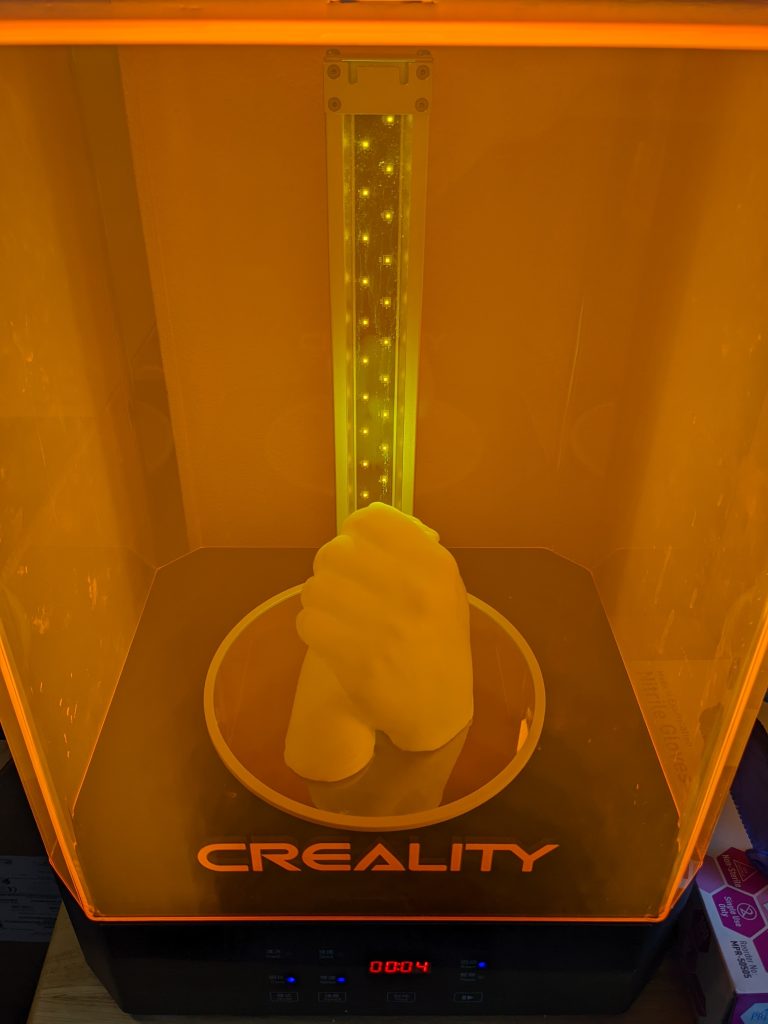
Step 4 3D Printing (MSLA)
3D Printing (MSLA):
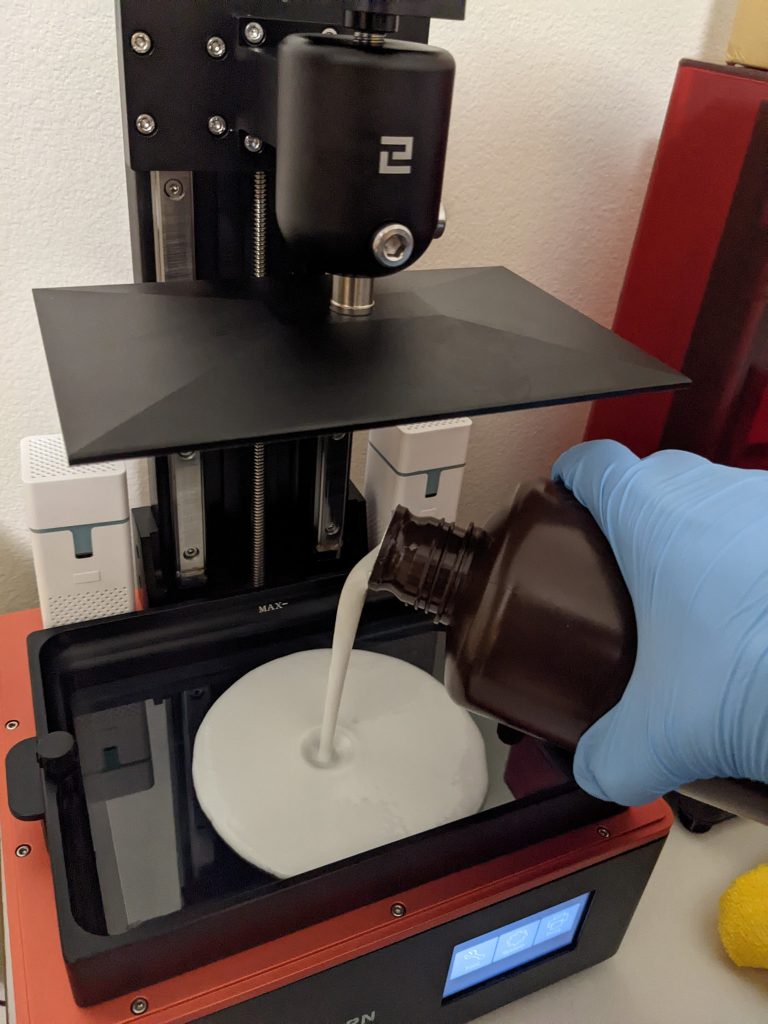
The fourth stage in my process involves 3D printing the molds. Following the creation of exposure images for each layer, the slice file is transferred to the printer either via USB drive or a network cable. A 1kg bottle of ABS-like UV-cured resin (white) is utilized for printing, ensuring a well-mixed resin photopolymer mixture for optimal molecular bonding during UV light exposure. The resin is poured into the resin tank, situated above an LCD screen controlling layer exposure images and a UV light source.
The 3D printer submerges the print bed into the resin tank, leaving only a 0.05mm gap between the bed and the FEP sheet at the tank’s bottom. The 4K LCD screen displays layer images, and UV light exposure occurs for 20 seconds for the initial 7 layers, followed by a 2.5-second exposure for the remaining layers. Depending on the print, a pause might be necessary to add more resin midway. After completion, the printed mold, print bed, and resin tray are cleaned using 99% isopropyl alcohol.
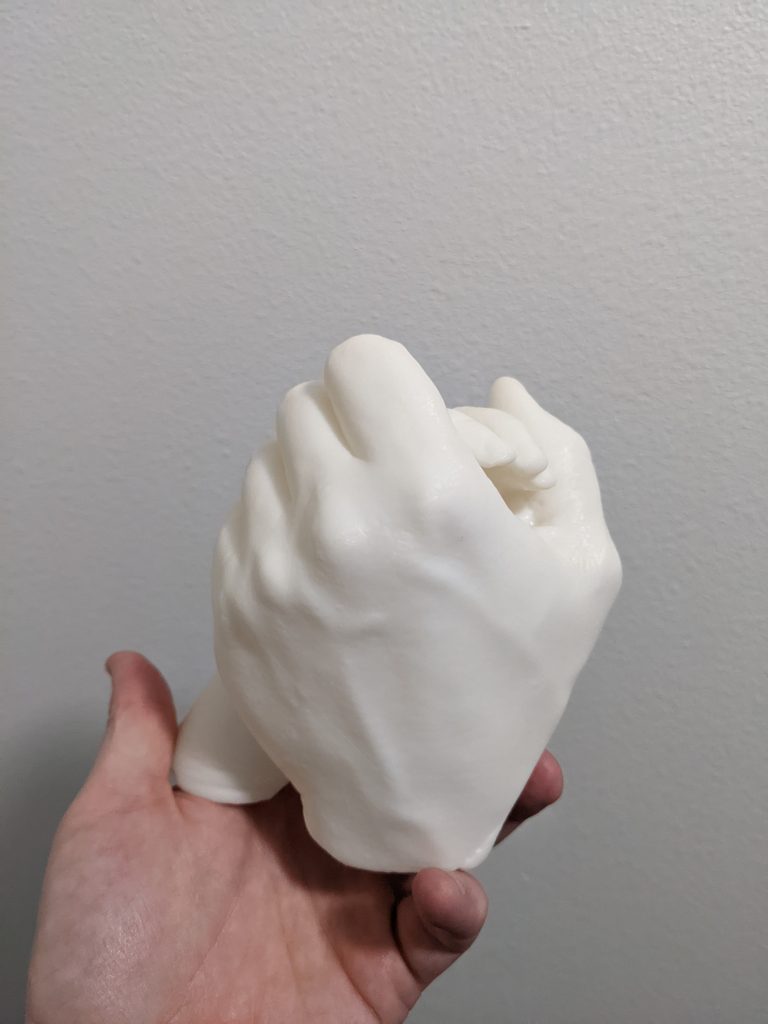
Step 5 Wash and Cure
3D Print Washing and Cure:
The cleaning process occurs in a magnetized cleaning/curing station, where a magnetized motor and aggregator move the alcohol around. A toothbrush may be used to clean corners. Once cleaned, the print air-dries before undergoing post-curing. The resin tank’s clean tank option exposes UV light to remaining resin, turning it into a solid sheet for disposal. Post-curing involves additional UV exposure to ensure complete curing, with a limited 4-minute exposure to prevent yellowing of the white print.
Lessons Learned 1
3D Print Washing and Cure:
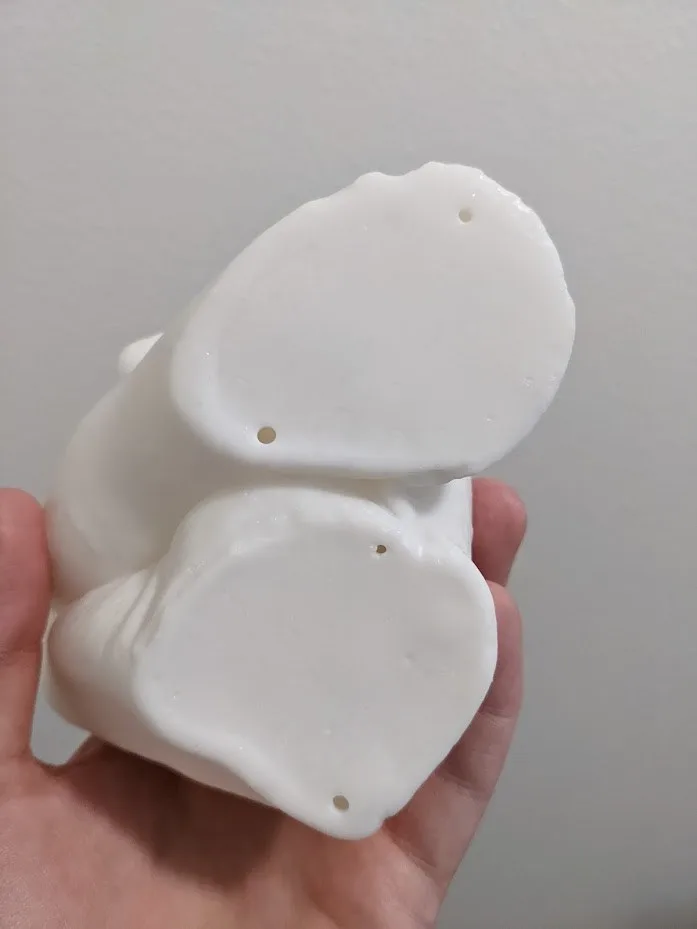
Overcoming hurdles is an integral part of life and learning, and My Angel Prints has provided numerous opportunities for me to navigate and conquer these challenges. One of those obstacles involved recurrent print failures in large angel prints, stemming from wrinkles in the FEP sheet at the bottom of the resin tank. Suspecting it was due to prolonged printing of a large surface area, my research confirmed this was the case. After struggling, I engage in research to find a solution.
Resin printing entails the build plate moving downward until it reaches a 0.05mm distance from the FEP sheet, where UV light cures the resin for a few seconds. The build plate then lifts away, creating a suction force that can damage the FEP sheet or cause prints to stick. To address this, I hollow out the print and add holes near the build plate, reducing the surface area and releasing suction force. These holes also facilitate draining excess uncured resin. Applying resin and UV light to patch the holes post-printing, I achieved successful large prints using these techniques. Another hurdle cleared!
Lessons Learned 2
Angle the print’s flat surfaces:
You may notice that this successful print is angled differently from the printer file image above (Step 3). This is because I discovered that the flat part of the print shouldn’t be parallel to the print bed; instead, it should be at an angle to prevent sagging along the flat surface of the print.
Lessons Learned 3
Remove printer supports in warm water:
The printer supports can be a little tricky to remove. One trick is to the place the print in warm water for a few second. The supports will loosen up with the temperature change and are then much easier to remove by hand.